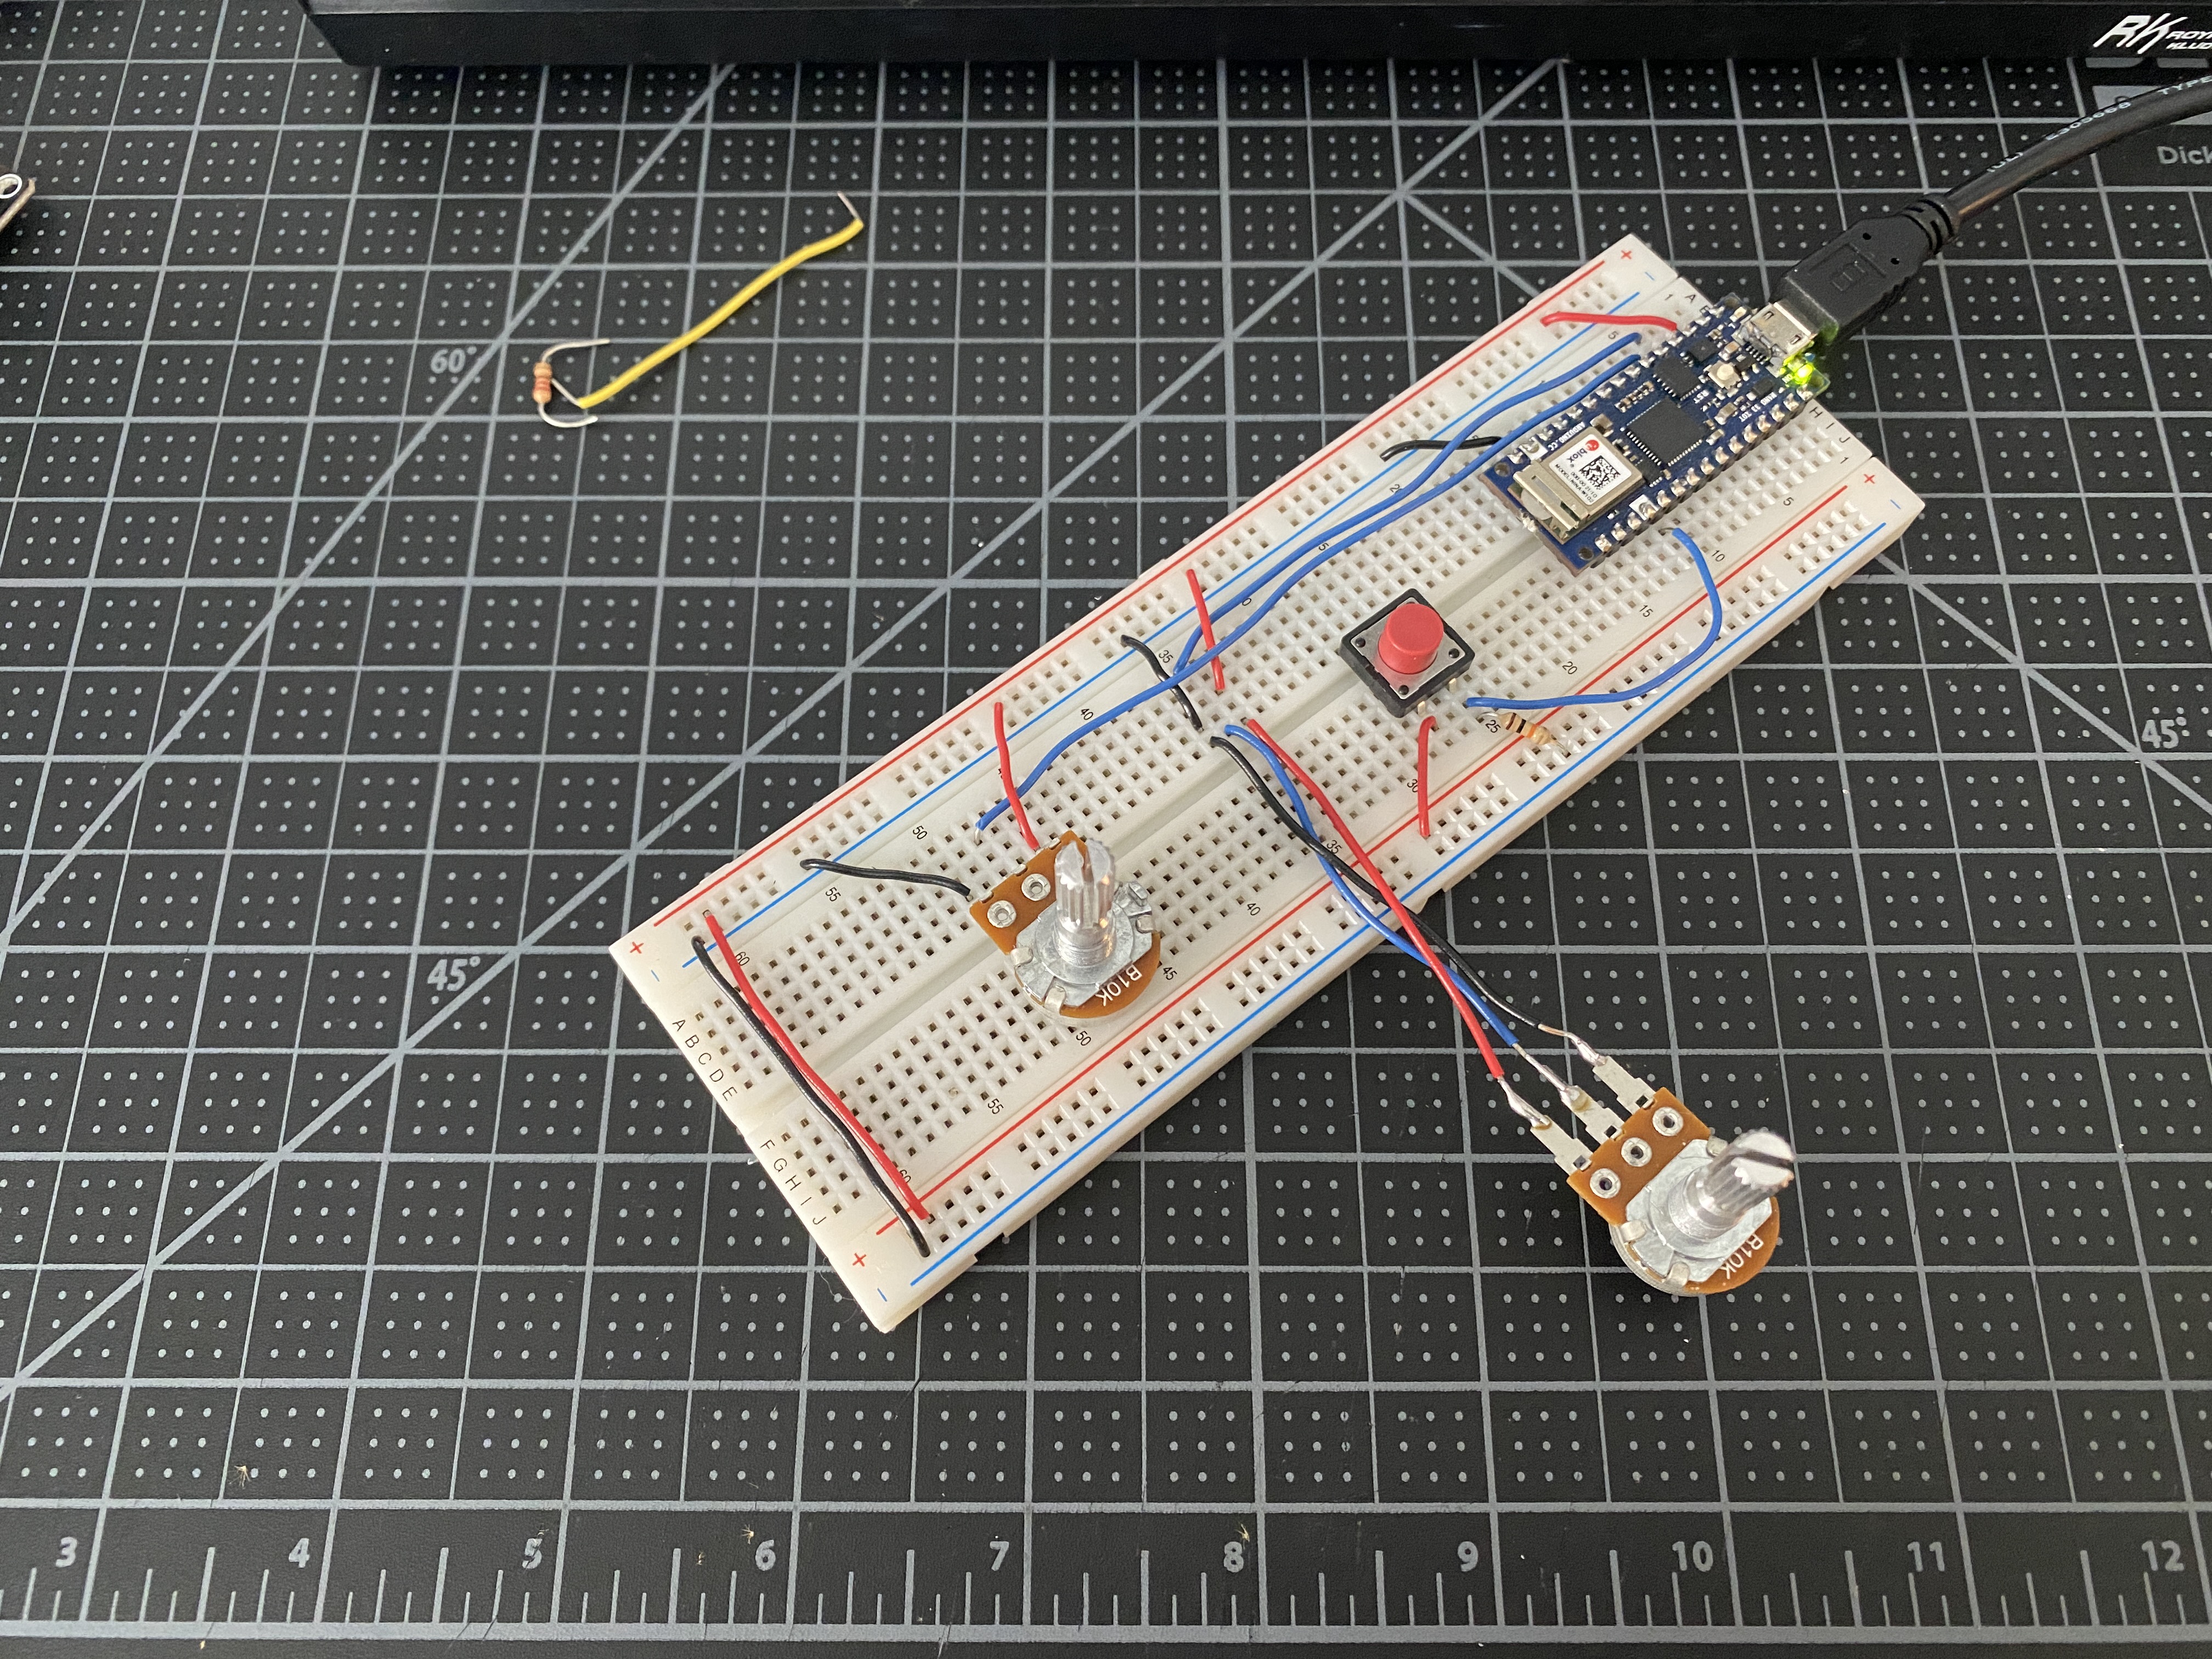
A had a bit of an issue starting this lab where my Arduino would not power
on. It wasn’t the USB cable, and it would power on if I unplugged the Arduino
from my breadboard, so it had to be something connected on the board. I unplugged
everything trying to find the problem, turns out it was a bad pot.
So I swapped it out for another and the Arduino turned on and I was able to
move on with the labs.
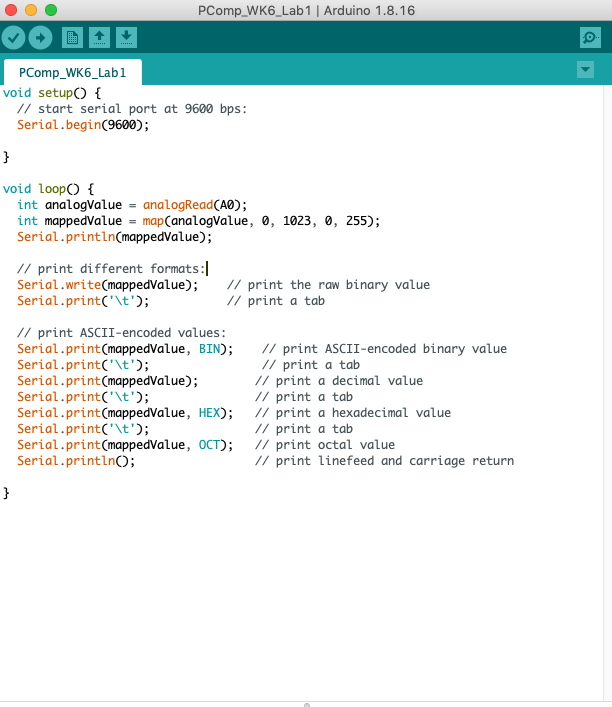
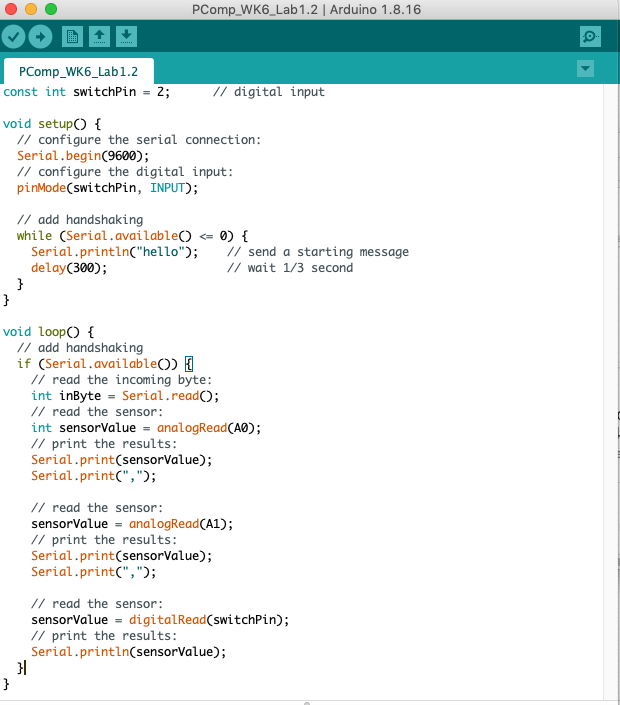
Sending the data in many formats
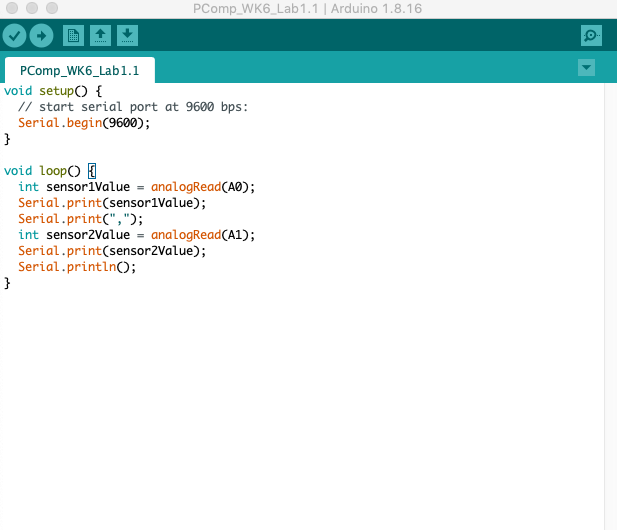
Formatting multiple serial data: punctuation
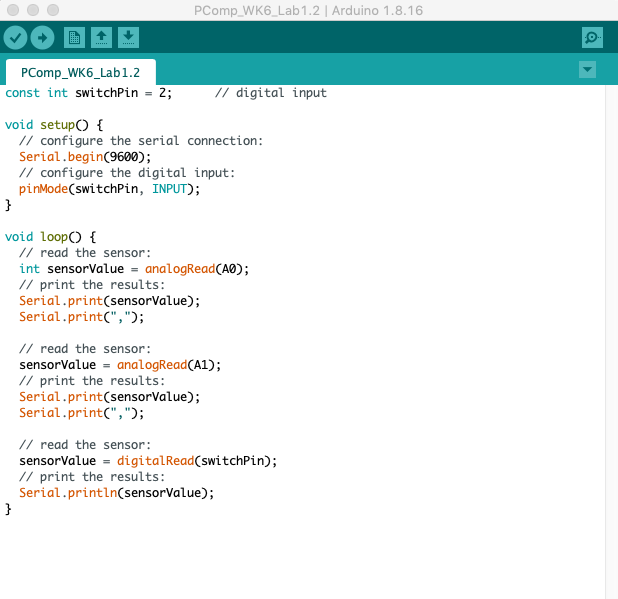
With two potentiometers and a pushbutton.
With two potentiometers and a pushbutton.
Flow control: call and response (handshaking)
Serial Input to P5.js
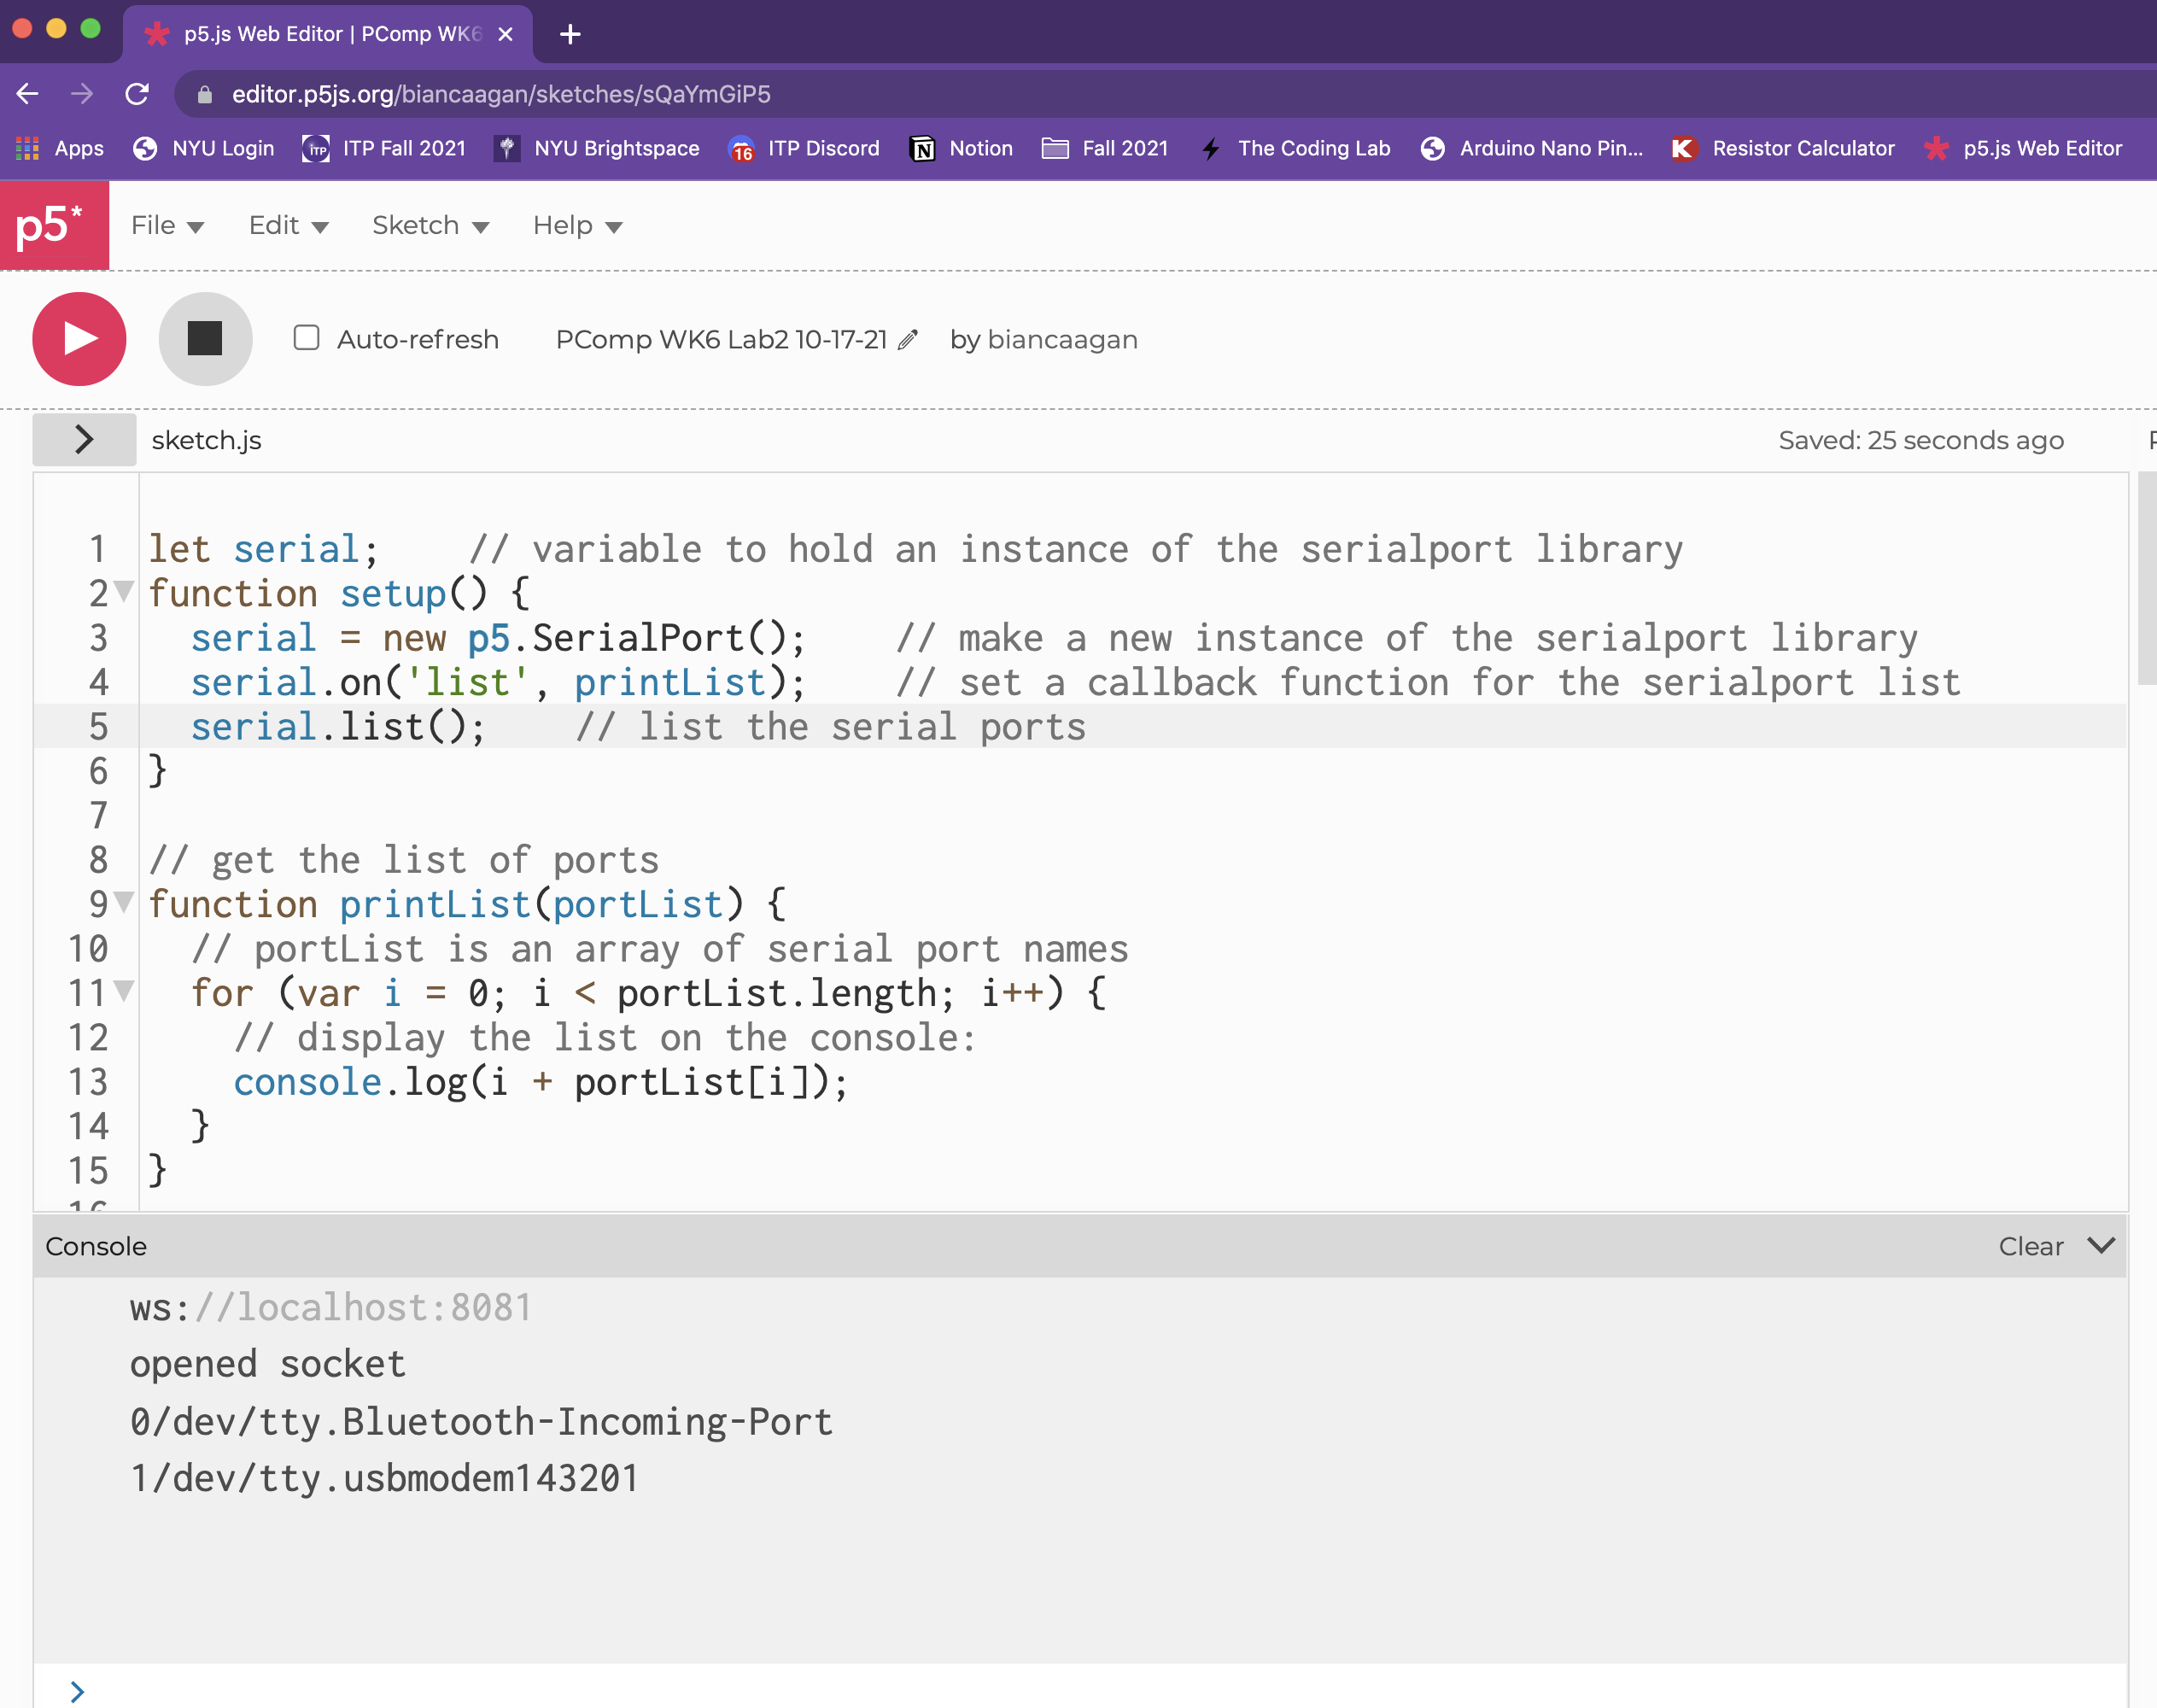
Program P5 to list the available serial ports
Reading a sensor and displaying the results in P5
I had one small hiccup here where the port kept reading undefined. I was
reading through my code to see if I had missed or misspelled anything when
I noticed my port name was “/dev/cu.usbmodem143201” which is what it is in
Arduino IDE, however in the p5.serialcontrol software it reads
“/dev/tty.usbmodem143201”, so once I fixed the name it worked.
Adding a serial port select menu
Draw a graph with the sensor values
Serial Output from P5.js
Controlling the brightness of an LED with p5
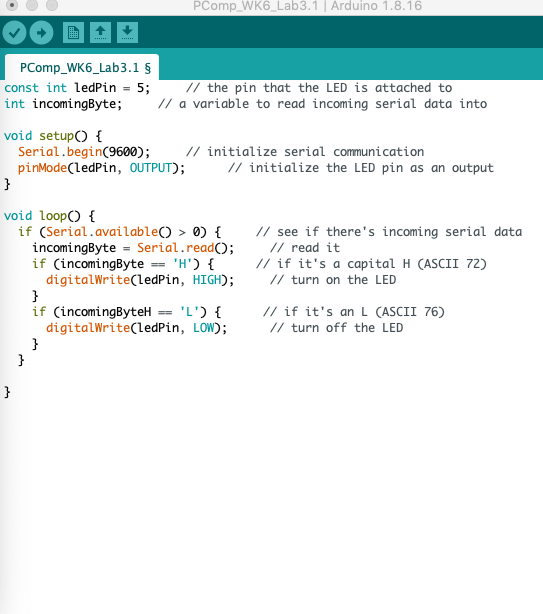
Sending ASCII-encoded serial data
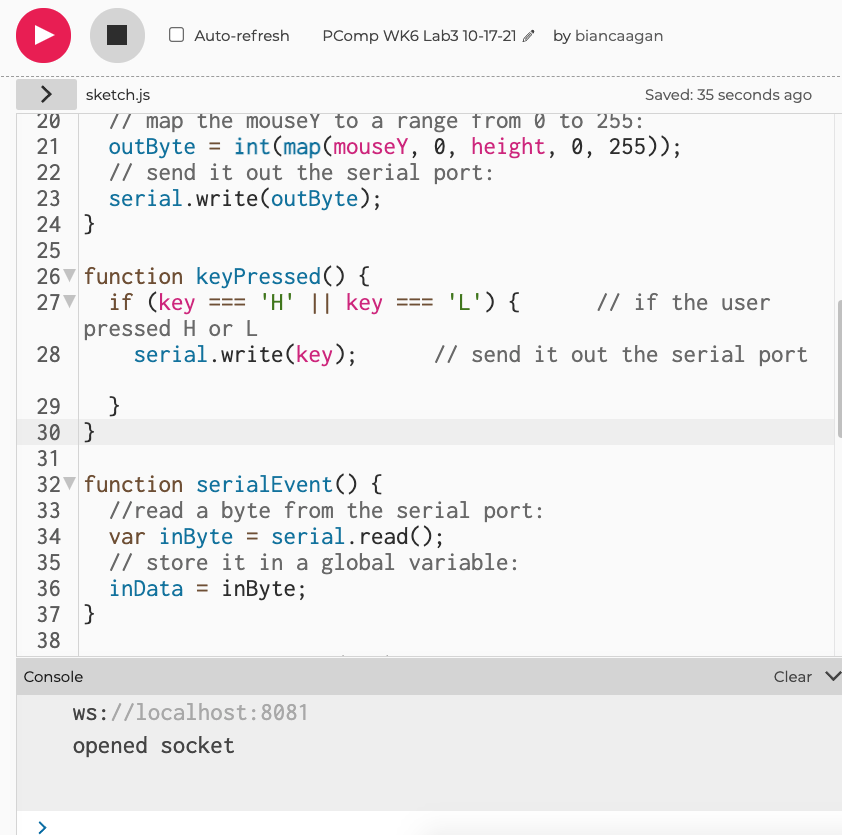
Program P5.js to control the LED
Adjusted the keyPressed function to turn the LED on or off when 'H' or 'L' is pressed on the keyboard.